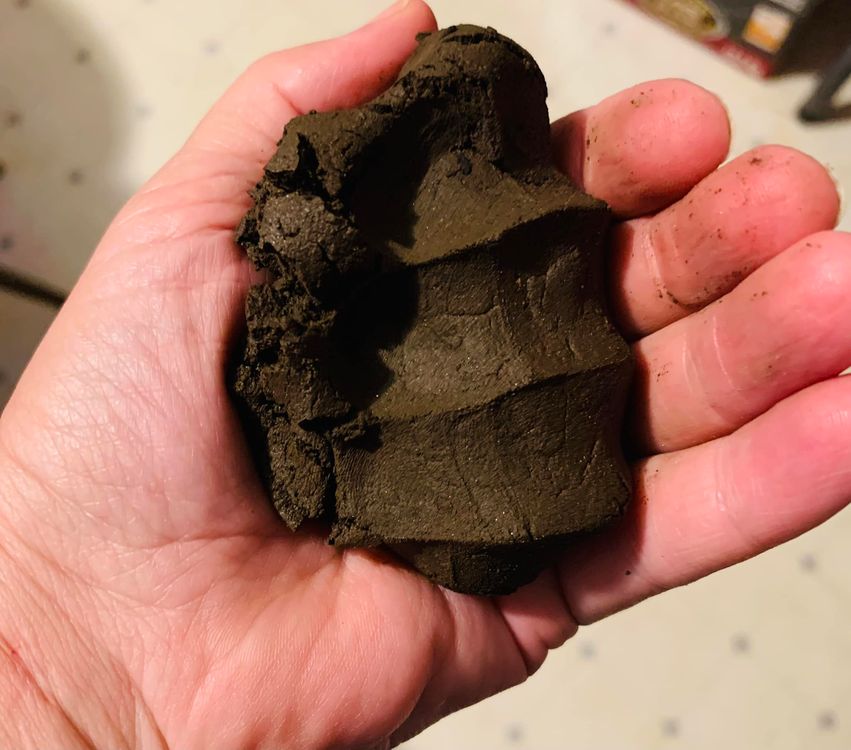
Meadow has been having fun at her attempt to process clay (for cob) from regular soil… and humus. She wants to do some small yard projects, such as making a cob pizza oven, and a larger RMH (Rocket Mass Heater) project later on. However, the soils on this property in Pubnico, Nova Scotia are quite varied, ranging from regular soil, humus, and peat, depending on which micro-ecosystem you are walking through on these 11 acres. Close to the ‘hill house’ where Forest and Meadow live, is mostly yard soil, and behind the house–below the hill–is humus in areas where water drains and collects (somewhat swampy in one section). It is from these two things–soil and humus–that she wanted to “make” the clay. This picture is of one of the first samples she made below.
There’s quite a difference between these two types of “dirt” (dirt is what gets on you). Soil is the earth (sand, silt, clay, aggregate, etc.) while humus is the decomposing soil and leaves, sticks, or other plant matter by soil microorganisms (so is a black colour). Where adding some humus to the gardaen is good, regular soil may or may not be as full of nutrients, depending on its composition (pH may also vary). The rule of thumb in permaculture is, if it is not good for gardening, it is probably good for construction/building. Clay, is good for both.
So Meadow decided to make cob… but first she needed clay, since cob is a mixture of clay and straw.
Cob recipes vary, but a general version is typically 1 part clay, 2-3 parts sand, and some chopped straw/dried grass. Some people add lime or other things, but standard cob making does not require this. However, you do need a very decent clay if you want to get the proportions right. So since most soil does not contain enough clay, it must be extracted through adding water to make a clay slip (clay slurry), pouring off the smaller particles in suspension while leaving the larger debris/sand/rocks behind, then drying out the slurry in a bin (evaporating the excess water naturally works well, as does filtering through a bag so excess water drains out), and what remains should be a nice sticky clay.
Meadow made three jar tests to see how much clay each one had…
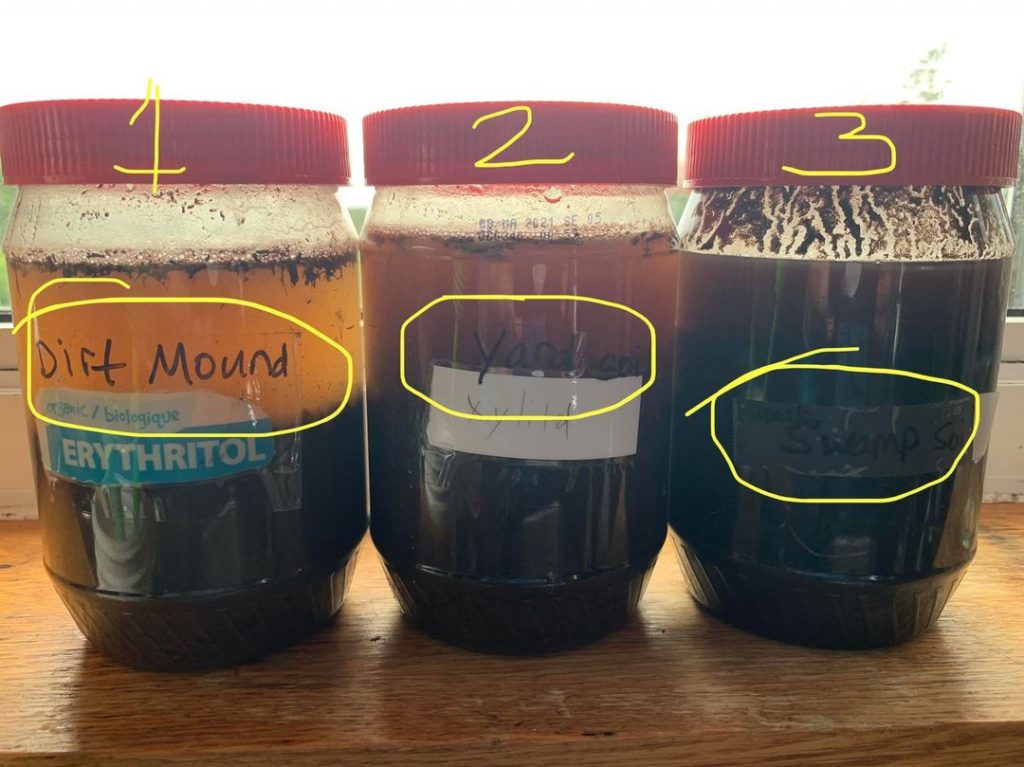
The first thing to do was to know how much clay is in the soil. So Meadow took soil samples in a clear jar (filled half way), then added water (near the top), shook it up vigorously, and let it sit for 1-2 days. The mound soil and yard soil settled within 1 day, but it took 5 days for the humus to settle (and then not completely–it had a ton of small particles! But was it clay, necessarily?).
One can determine how much clay any soil contains by doing this jar test. Once it’s settled, look at the layering. The clay was just a top layer, which was not very easy to see, and underneath that was silt. Below that layer was sand–that and rocks and any sticks or debris fell to the bottom since they were heaviest. The jar test was done. It appeared that there might be enough clay content to pull it out for cob.
So how to make clay?
From this point, Meadow shook up the jars again and let it settle for about a minute before pouring the top water through a sieve into a clean jar. She left all the rocks and sand in the original jar and tossed it out. What she was left with was a debris-free clay slurry, which is just clay in suspension, also officially called a clay ‘slip’.
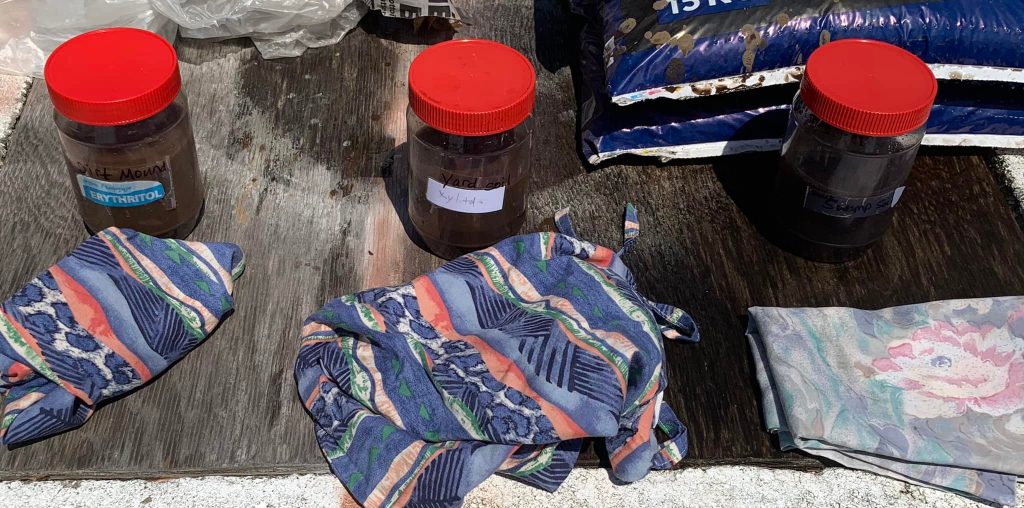
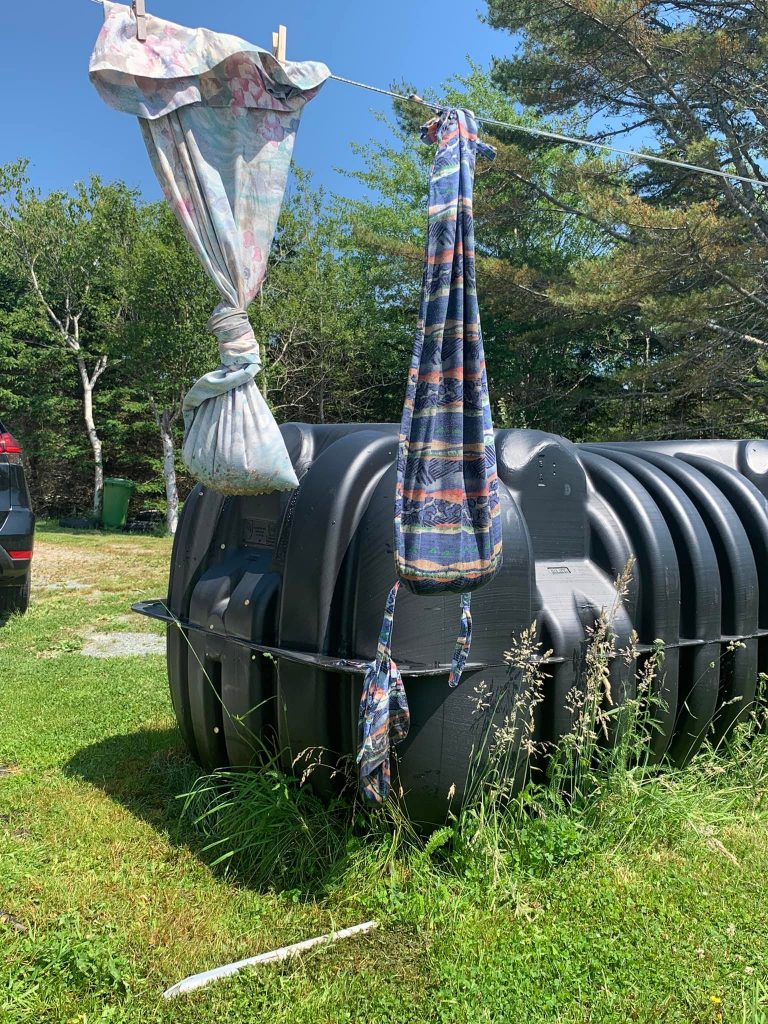
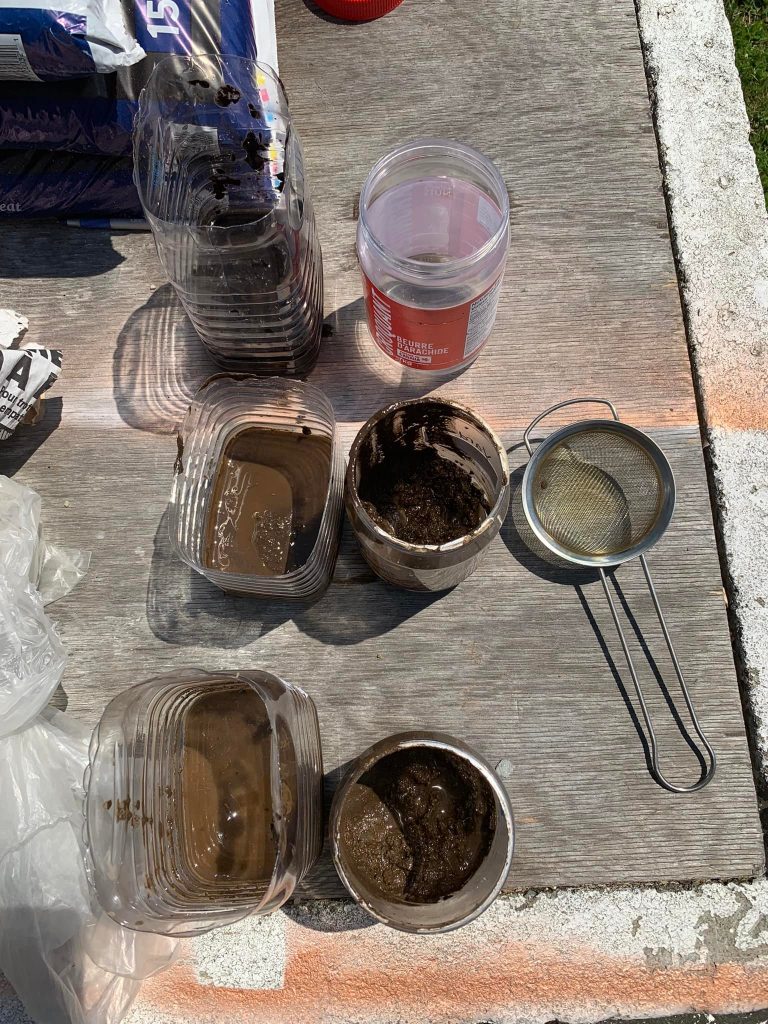
Meadow then took the slips and poured them into fabric bags or pillowcases, tied them off, and hung them up to drip overnight.
The next morning she had clay!
Well, it was silty clay anyway. She figured the humus probably had clay in it, but some of the stickiness of humus actually comes from the the waste from microorganisms that eat the decayed organic matter. So it was difficult to tell if the humus ‘clay’ was true clay, or just how much clay it actually had in it. Chances are, Meadow figured, that clay would not be very useful for building with. She had other ideas for experiments with the humus, but that is a topic for a different article.
This was a first attempt at making clay, and since then she has been making clay by using the bucket method rather than just small jars.
Anyone can do this easily enough. Once you have the clay, it can be mixed with course sand and straw to make cob or adobe (adobe blocks are 30% clay, 70% sand, and straw mixed in).
Humus Block Experiments
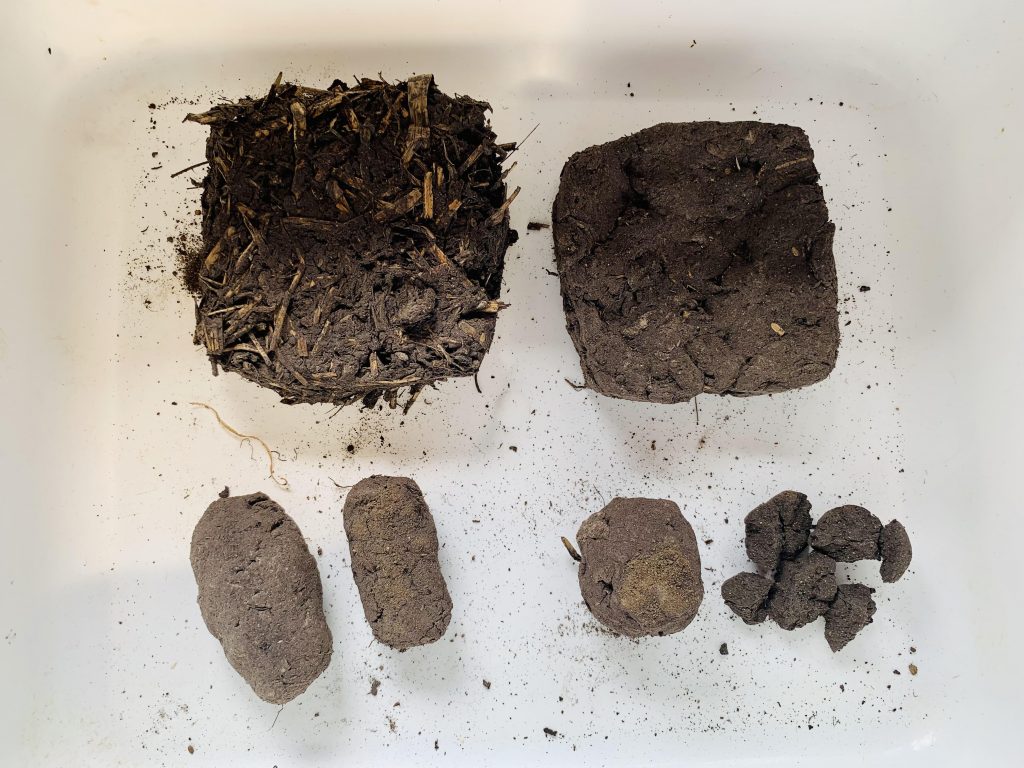
Here is a picture of the humus “clay” (more like organic matter than actual clay, but interestingly, it FEELS slick and sticky like clay) that was made into test blocks/loaves/balls, some with toilet paper (TP) or straw added, and then baked for over a week in full sun on a piece of metal roofing, but under a window-with-frame (solar oven style). Ideas for makingi humus “cob” were not out the window just yet, but it seemed that other ideas were trickling in… so experiments were well on their way!
The clay slip (will call it a “humus slip” from now on) was made from humus and the top (humus) separated from the bottom half (organic matter–very “fluffy”).
Top Left: humus fluff with straw (light but broke in half easily)
Top Right: humus fluff with TP (apparent hairline cracks but was quite strong)
2 on Bottom Left (top half of jar): humus with TP (left) and straight humus (right) – the one with TP was very strong!
2 on Bottom Right (bottom half of jar): fluff with TP (left) and straight fluff (right) – the one with TP was stronger and the plain fluff broke easily when squeezed due to cracking
NOTE: Meadow’s hands are not the strongest, but she was able to break the regular ‘fluff’ humus readily; whereas, the top humus was not breakable, and anything with TP in it was very HARD to break (unbreakable in her hands). The TP blended into the humus acts like papercrete (paper with cement and sand), providing additional insulation value, as well as acting as a binding agent, with the end product more like unstabilized fidobe (a combination of adobe mud with papercrete, in block form). Normal fidobe has sand in it, and more dirt, and is less “fluffy” so *may* have more conductive qualities compared to regular papercrete. It is Meadow’s hope that the fluffy qualities of humus, mixed with paper/TP, will provide a strong and at least semi-fire resistant form of insulation.
Who knows! It’s an experiment after all!
Humus for Insulation?
It is NOT recommended to use humus for these purposes normally (it is a rare and valuable resource!), but there is a drainage area at Forest & Meadow Villages’ property (Edgewood Ecovillage side) that will be dug out for a pond later and all the humus that does not get used for the garden will be piled up or go to waste. Meadow is hoping to find a use for it.
Since humus has “fluffy” properties, but is not necessary CLAY itself, it was suggested by someone that humus could be used as insulation. Surely they meant “insulation” as in covering crops with humus as a form of mulch, but Meadow’s brain for alternative construction insulation ideas (like how they used fungus/mushroom mycelium for door insulation on the Permies website) made her see the “fluffy” qualities of the bottom part of humus (when mixed with water and allowed to settle) and thought it might be sun-baked and used as insulation.
Here is a float test…
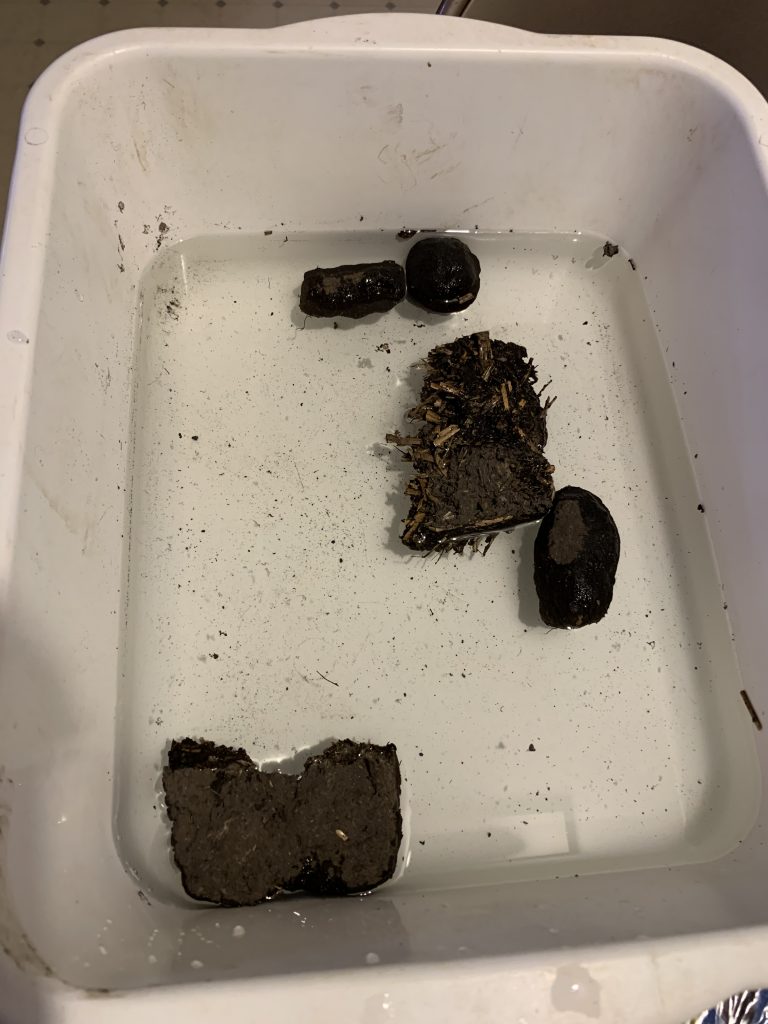
They all float (down here)! 😉
But for how long…? The ones with paper fibre floated for the shortest time, and the ones with straw stayed up the longest, but once waterlogged, more likely to fall apart. The strongest ones had paper fibre in them.
So the next steps are to make and then test different 6″x6″ baked blocks of (non-separated) humus slip and tested for insulation qualities (both strength and heat resistance).
Keep watch for updates! Later, hopefully there will be a fire test.